Friday, September 25, 2015

Homemade Pici Pasta

Without a doubt (at least for me), the best holiday David and I have taken was when we went to Florence, Italy. I spent most of the time walking around with my mouth hanging open being awed by the architecture, art, sculptures, and yes, the food. Dear readers, please believe me that I did manage to not chew my food with my mouth open.

Whenever I'm feeling nostalgic about that particular trip or Italy in general, I reach for the books written by Frances Mayes. You may be familiar with her for writing Under the Tuscon Sun. One of her novels that I recently read is Every Day in Tuscany: Seasons of an Italian Life. In one chapter, she relates a dinner that was made that included pici pasta. Now I've read this book before, but this particular passage never jumped out at me. Maybe that I've been making my own pasta, it now caught my eye. Whatever the reason, I did some research and found this recipe (courtesy of Italian Food Forever).

I went ahead and made the dough and let it rest for almost two hours. It's interesting that this is the first pasta dough recipe I've run across that doesn't include eggs. 


I divided the dough in half, covering the portion I wasn't using back in the plastic wrap.

The dough got rolled out to about a 1/4 inch thickness.


Using a pizza cutter, the dough was cut into strips.


Then, using my fingertips, each strip was rolled out to form a tube. The technique is similar to making bread sticks.


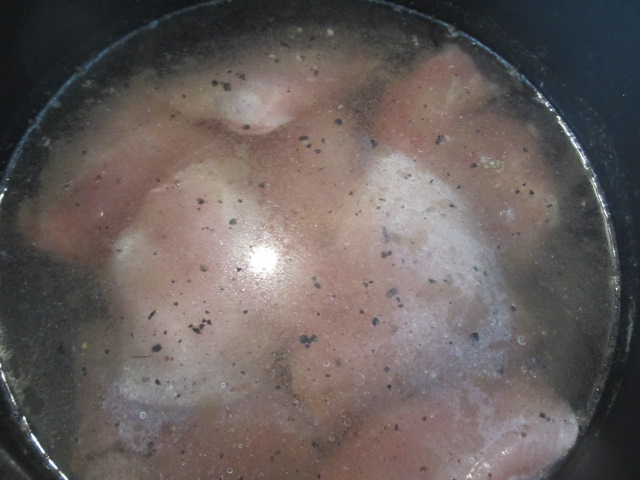
I let the pici dry for about 25 - 30 minutes, then cooked them in a pot of boiling, salted water. During the time the pici were drying, I heated up some home made pasta sauce.

The end result:


The pici were tender, not at all mushy. The sauce was great. But...I can't say I love this pasta. It just seems somewhat overwhelming with its thickness. Maybe pairing it with a Bolognese sauce would help? I'm willing to play around with it again and maybe try to make the pici a bit thinner. But make no mistake, pici or no pici, this girl is always happy to make a culinary trip to Italy.

Ricotta Stuffed Pork Chops

During a recent reorganization of our freezer, I came across a container of ricotta that really needed to be used sooner, rather than later. Casting about for what to do with it, I remembered this pork chop recipe (courtesy of Fine Cooking).

First step: Saute some red onions, garlic, roasted pepper, rosemary, red pepper flakes. When done, the mixture was transferred to a bowl.


Second step: when cooled the onion mixture was stirred into the ricotta cheese.

Third step: I made a slit in the pork chops and spooned in some of the ricotta mixture.

Fourth step: The chops were then seasoned with salt and pepper and given a quick sear on each side/


Aren't these just gorgeous?

Fifth step: The chops were transferred to a pre-heated 325 degree oven and left to roast for about 10 - 12 minutes.

Sixth step: Plate it up!


Okay so on the high side, the ricotta filling was very tasty and would definitely like to use it again in other applications (maybe a ravioli filling?). On down side, I screwed up the cook time for the chops, so they weren't as tender and juicy as I would have liked. Man you take your eye off the prize for one second and BAM! your chops are toast. Well they weren't that bad, but you know what I mean. Sigh.

Oatmeal Cranberry Cookies

Last week, David had a yen for some oatmeal cookies. In rummaging through my online files, I found this recipe (courtesy of food.com) tucked away in my bookmarks. While I didn't have any raisins, I did have a bag of dried cranberries hanging out in the fridge.

Having worked with various cookie recipes in the past calling for raisins or other type of dried fruit, I learned the best way to bring out their flavor and texture is to rehydrate them. I popped the cranberries into a pot of simmering water and let them plump up. They got drained and set aside to cool.

Typical of most cookie recipes, I creamed together the softened butter with brown and white sugar. Because of the sweetness of the cranberries and the fact that honey would be added later, I only used 1/2 cup of packed brown sugar.

Next eggs were added, along with the honey and vanilla. Once everything was incorporated, the dry ingredients were added in two batches.

At this point, the cranberries were cooled off and stirred into the batter. After spooning the batter onto prepared cookie sheets, they were put into a pre-heated 350 degree oven. The recipe suggests a 9 - 11 minute bake time, but I found my cookies were done closer to 8 minutes.

The end result? Oatmeal cranberry cookie bliss. I was impressed that the cookies retained their chewiness, not only for that day, but in the days that followed. This recipe is definitely a keeper.

Pasta with Shrimp and Chorizo

On a recent trip to Frank's Meats, David spied a package of chorizo. As it's not a sausage we frequently have access to, we decided to buy it and stick in the freezer.

As luck would have it, a few days later this shrimp and chorizo recipe (courtesy of Fine Cooking), popped up on my Facebook feed. I immediately tagged it for a meal the following week.

The first step was to brown the chorizo. A couple of things to note about this particular product. First, the casing is plastic, which clearly isn't going to enhance a dish if placed in a hot pan. The second thing is the texture of the chorizo was on the dry side and rather crumbly. Not that it's a bad thing, just different from some other chorizo I've cooked with.

After the chorizo browned, the peeled/deveined shrimp went into the pan. They were left to cook only until they turned pink and just started to curl. 


It's really important not to let the shrimp cook all the way through. The recipe suggests about a two minute cook for the shrimp, but depending on your stove top, it could be less.

When the shrimp were ready, they and the chorizo were transferred to a bowl.

Some diced onion was put in the pan...


...then some garlic, tomatoes, and red pepper flakes.

While that mixture cooked away, I made the pasta. The recipe calls for linguine, which I could have made, but was feeling a bit lazy. Instead, I used packaged rotini. 

After the pasta was cooked and drained, the shrimp/chorizo were added to the pan with tomatoes, onion, and garlic. 


The shrimp only needed about a minute to finish cooking through, then the pasta was added.

Overall, we liked the dish but wished the chorizo had a bit more heat to it. That being said, I would definitely make this again and probably add a bit more red pepper flakes if using the same chorizo. 

Vinegar Braised Chicken

Back in the day when David and I were both working and he was doing all of the cooking, one of his go-to dishes was balsamic chicken and onions. The dish comes together quickly, tastes delicious, and is the perfect comfort food after a long day at the office.

So when I saw this recipe (courtesy of Epicurious), I realized with a few adjustments to the ingredients, this could take our chicken and onion dish to a whole new level. Yes, it does take a bit of time, but you won't regret one single second. 

I got the ball rolling by browning up some diced bacon. 


The recipe calls for pancetta, but that isn't something I've been able to find in Corozal.

After the bacon was browned, I used a slotted spoon and transferred it to a bowl.

Next, I tossed a bunch of chopped onions into the pan that the bacon browned in.


I used regular yellow onions, instead of cipolline or pearl variety. Again, not ingredients you find in these parts.

When the onions started to brown a bit, garlic cloves were added and left to cook for a few minutes. The onion/garlic combo was then spooned into the same bowl containing the bacon.

It was time for the chicken!


Working in batches, I seasoned the chicken thighs with salt and pepper and browned them on both sides. When each batch was done, it was added to the bowl containing the bacon, onions, and garlic.

The excess fat was removed from the pan and balsamic and red wine vinegar were added. WARNING: At this stage do not attempt to take a sniff of the steam emanating from the pan, unless your sinuses are completely clogged. Not that I would pull such a bonehead move, but...

Chicken stock, the pancetta, onions, garlic, and chicken thighs were then put in the pan. After letting everything come up to a boil, I reduced the heat and let it simmer for about 40 minutes.


While the chicken was simmering away, I made a batch of smashed potatoes and got ready to plate.


The chicken was moist and juicy and the sauce? Oh my gosh, it was magnificent. The combination of balsamic and red wine vinegars brought just the right level of punch, without in any way being overpowering. The sweetness of the onions came shining through, and, of course the richness of the bacon. A truly delightful and amazingly delicious dish!

Sunday, August 30, 2015

Chocolate Mascarpone Brownies

I had some homemade mascarpone left from when I made a recent chicken dish. As we had already explored a savory way to use the cheese, I wanted to do something more on the sweet side. Enter Chocolate Mascarpone Brownies (courtesy of Food.com).

Spoiler Alert: these brownies are not low-cal. 

Things got started by chopping up some chocolate and melting butter in a saucepan. When the butter was hot, it was poured over the chocolate bits and stirred until the chocolate was completely melted.

Sugar and cocoa powder was sifted into the melted chocolate and given a stir to combine.

Next came beating in the mascarpone, eggs, and vanilla extract. When that was combined, flour and salt was then folded in.

My island counter top at this stage of the recipe:


Hey, sometimes it's good to be messy!

The brownie batter was poured into a pan and put into a pre-heated 325 degree oven to bake for about 45 minutes.

After they were taken out of the oven, the brownies cooled on a rack for about 20 minutes. 


Without a doubt, these are the best brownies I have ever made and eaten. Thick, rich, almost a fudge-like denseness. Simply over the top. You might note that recipe calls for making a ganache to be spread on top. I personally think it would be way too much sweetness. But, hey, that's just me. But no matter what you do, make these brownies posthaste!

Chicken with Mustard Mascarpone Sauce

Recently I was casting around for a different way to cook chicken thighs. As luck would have it, I found this recipe (courtesy of Italian Food Forever). The idea of combining mascarpone cheese with mustard to make a sauce sounded interesting. 

To get the ball rolling, I made a batch of mascarpone the day before I made the chicken, as it needs time to set up.

The next day, I started on the chicken. Thighs were seasoned with salt, pepper, and oregano and roasted in a 375 degree oven for about 30 minutes.

While the chicken was baking, I got started on the sauce. The recipe calls for browning up some diced pancetta. That being an ingredient that is hard to come by, here in Corozal, I substituted bacon instead. 


When the bacon was done, I tossed in some finely diced onions and minced garlic. After that, some dry white wine was added, and let to reduce by half.


From there, some homemade chicken stock, thyme, Dijon mustard, salt, and pepper were added. The heat was reduced a bit and the mixture was left to simmer for about nine minutes. The mascarpone cheese was then whisked in.


It was time for dinner!


I served the thighs over a bed of rice, spooned some of the sauce over top, and garnished with some of those lovely bacon bits.

The chicken was tender and moist and the sauce was outstanding. Not overly heavy (the chicken stock helped to keep it tasting light), with just the right amount of tang from the Dijon mustard.

I had sauce left over, so it got incorporated in a chicken taco recipe I made a few days later. Just warmed it up a bit before drizzling on top of the chicken bits and other goodies the taco contained. Delicious!


Sunday, August 23, 2015

Garlic Butter White Wine Shrimp Fettuccine

I'm a girl that can't resist a cream sauce. And when a cream sauce coats shrimp and pasta? I'm all in. And this recipe (courtesy of Pinch of Yum) does not disappoint.

To get things started, I made a batch of homemade fettuccine. 


Yes, the recipe calls for linguine, but I don't have an attachment for that on the pasta maker. I also thought the slightly broad profile of the fettuccine noodles would provide more real estate for the cream sauce. See? Always thinking.

With the pasta done, I heated some butter in a pan, added some minced garlic and gave it a saute for about a minute. Some homemade chicken stock was added, along with some water. The pasta was added and everything was brought to a boil.


I lowered the heat and let the pasta simmer until almost all of the liquid was absorbed.

In another pan, I melted some butter and added the shrimp.


Wine was added to the shrimp, along with some garlic and sage. This is where I deviated from the recipe. Instead of covering the shrimp and letting continue to cook, I added it right into the pasta. My concern was that if I let the shrimp keep cooking, they would be overdone by the time it came to bring all of the ingredients together.

Anyway, with the shrimp now introduced to the pasta, I added cream, Parmesan, a quick squeeze of lime juice, plus some salt and pepper. 


Is this dish low in calories? Not by a long shot. Is it rich, slightly decadent, and unbelievably delicious? Absolutely. Indulge yourself. I promise you won't regret it.

Chinese Chicken Pasta Salad with Sesame Dressing

It's August. It's hot. It's humid. It's time to break out a pasta salad for dinner. This recipe (courtesy of The Recipe Critic), contains so many of the Asian flavors that we love, so I decided to give it a try.

I had all of the ingredients on hand, except for the chow mein noodles. I knew what the author was intending, which was to use the cooked and crunchy noodles. Couldn't find any here, so I made my own.

This is the package I worked with:


I eyeballed about how much I would need, broke them off from the rest of the package...


...then cooked the noodles until just done.

Then I heated up some vegetable oil in a saute pan and added them into the pan in batches.

In no time at all, I had a pile of crispy, crunchy noodles.


From there, it was just a matter of combining chicken, lettuce, pre-cooked rotini pasta, cabbage, onion, carrots, and almonds. I didn't want the chow mein noodles to get soggy, so I left them as a garnish once the salad was tossed with the dressing.

And speaking of the dressing, all it takes is vegetable oil, rice vinegar, sesame oil, honey, dijon mustard, soy sauce, sesame seeds, plus a bit of salt and pepper. Whisk it all together until combined, then pour over it over the salad.

The chow mein noodles were scattered on top and we were ready to eat.

This salad has it all -- sweet, spicy, salty, crunchy, nutty. We loved it and it will make return appearances on our table year round.

Wednesday, July 29, 2015

Whitefish with Citrus-Olive-Caper Sauce

In addition to eating lots and lots of chicken, we also dine on a fair amount of fish. Snook fillets make a regular appearance on our table, and I'm always looking for different ways to serve it.

So while this recipe (courtesy of epicurious) calls for using Sea Bass, I decided to work with our snook instead, knowing its firmness and texture could probably handle the sauce. Plus, with just a few ingredients and very little prep time, dinner could be on the table in no time flat.

I put a pan in the oven, as close to the broiler as possible, and pre-heated it for five minutes on high.

While the pre-heating was going on, I mixed together some lime slices, fresh oregano, lime juice, capers, chopped olives, olive oil, and some salt and pepper. Because I was feeling wild and crazy, I also chopped up some plum tomatoes and added those into the mix.

When the pan was ready, I took it out from under the broiler, coated the fillets with olive oil, salt, and pepper on both sides. The pan went back under the broiler for about four to five minutes.

Dinner awaits...


Overall, we enjoyed the flavors of the sauce with the fish. I should have chopped the olives a wee bit finer, as their taste would sometimes take over a bite of the fish/sauce combo. That being said, I would definitely make this again and think the citrus-olive-caper-tomato mix would be absolutely superb spooned on some crusty bread.


Slow Cooker Balsamic Pork Tenderloin

There are days that doing a meal in a slow cooker is the way to go. Everything in one pot, turn the pot on, and have the rest of the day to do what you please. One might also say that a slow cooker is a boon during the summer months, as there is no need to turn on the stove or oven. But because I am a loon, I made this slow cooker meal on the same day that I baked bread and roasted off tomatoes. So much for keeping the kitchen cool.

But I digress...I've prepared pork tenderloin in a variety of ways, but never in a slow cooker. After reading over this recipe (courtesy of Add a Pinch), I knew I needed to make it.

After removing any fat and silver skin from my pork tenderloin, I plopped it in the insert of my slow cooker.

Then chicken stock, balsamic vinegar, Worcestershire sauce, soy sauce, honey, red pepper flakes, and chopped garlic were whisked together and poured over the pork.


I turned the setting to low heat and let it do its thing for about seven hours. As an aside, I turned the pork over about halfway through to make sure both sides were covered in the sauce.

When the pork was done, I got to work shredding it up.


I put the pork back in the cooker, kept the heat on low, added some chopped zucchini, and let it cook until the veg was done to our liking -- only about 25 minutes.

The final plating:

I served the pork, the oh-so-delicious sauce, with the zucchini and rice. The pork, not surprisingly, was incredibly tender and soaked up the sauce like nobody's business.

We had some pork leftover and David suggested serving it with some potatoes would be nice. So I made a hash and served it with a fried egg on top.

Delicious!

Nicoise Toasts

This recipe (courtesy of epicurious), like so many others, appeared on my Facebook feed. We really enjoy Nicoise salad and this seemed to be a fun play on it. However, I knew some substitutions would need to be made. For example:

Low-fat cottage cheese - if cottage cheese shows up in a grocery store, chances are very good that it will not be low-fat. It's regular cottage cheese, which is fine by me.

Parsley - this is not a herb generally available in Corozal, unless you have success growing your own. I substituted basil.

Lemon juice - lemons are only available on very rare occasions. We are lucky to have five varieties of limes in our yard, so I used ones that most closely mimic the taste of lemon.

Tuna packed in olive oil (preferably pole-caught) - this ingredient just slayed me. First, to find tuna in oil can be sourced, but it's not on all the grocery shelves. But pole-caught? Seriously? 

Once I stopped giggling, I got to work.

Cottage cheese, chopped hard boiled eggs, oil, basil, lime juice, capers, and some onion were combined in a bowl, then mashed together to a smooth paste.

In a separate bowl, the tomatoes, olives, more basil, oil, and lemon juice were mixed together. Then the tuna was folded into the mix.

Instead of toasting the bread, I fried the slices in some olive oil, then rubbed them with some garlic.

The egg mixture was spread on the fried bread, then covered with the tomato/tuna combo.


Dear readers, in spite of the substitutions, this tasted amazing. I do think the tomato mixture could use a little bit of brightening up...maybe a splash of red wine vinegar. But other than that, there are no complaints. Each bite gave a really delightful pop of flavor. 

So the next time a Nicoise salad strikes your fancy, give this a go and put it on fried bread. You won't be sorry.

Chicken Tinga

I greatly admire Marcus Samuelsson as a person and chef, and have always had great success with his recipes. This one, for Chicken Tinga, is no exception.

The first step was cooking the chicken. In this recipe, the chicken is seasoned with salt and pepper then placed into a pot with water, peppercorns and bay leaves.


This all was brought to a boil, then reduced to a simmer to cook for about 20 minutes. Throughout the cooking time, I skimmed off whatever schmutz came to the surface to keep the stock as clear as possible.

Once the chicken was done and cool enough to handle, it was shredded up and set aside. 


The stock the chicken was cooked in was reserved for this next step...the sauce.


Onions were sauteed in some olive oil, minced garlic was added, along with diced tomatoes (with their juices), some of the reserved stock, and some chipotles in adobo. I used a very light hand with this last ingredient, due to it fiery nature and the fact that I am a wuss about overly spicy, hot food.

The sauce was allowed to simmer away for about 20 minutes. It was then put into a food processor, pureed until smooth, then poured over the chicken.

To plate the dish, I put some of the chicken/sauce mixture on a homemade tortilla, then topped it off with a lightly dressed slaw containing cabbage, red onions, and carrots.


We are talking about some seriously good chicken. The kick from the sauce was countered very nicely with the slaw, which also provided great crunch and color.

I have no doubt that this dish will be making a repeat appearance on our table.


Tuesday, July 14, 2015

Garganelli (Homemade Penne) *UPDATE*

We love pasta of just about any kind.  I've knocked out homemade spaghetti, fettucine, papardelle, and lasagna noodles -- all courtesy of the pasta maker on loan to us from our friend, Bruce. But our favorite pasta is penne.

I know I can purchase an extruder to go on my KitchenAid to turn out some penne, but I wondered how it was made before all these newfangled gadgets hit the cooking scene.

What I discovered was before extruders became popular, people made each pasta piece individually, often using a contraption like this:


A simple, ridged block of wood with a small rolling pin. Technically, the pasta that is formed using this device is called garganelli. The difference between it and penne is that garganelli has a flap, whereas penne is a perfect cylinder. More info can be found at Cuisinivity.com.

I made a batch of pasta dough using flour, eggs, a little olive oil, and salt. After it rested for about 30 minutes, I divided the dough into four pieces.

With David's assistance, we started the process of rolling out the dough using the pasta machine. The machine we use has its widest setting at #7, the lowest at #1. We started at #7, rolled the first piece of dough through, folded it in thirds, and rolled it again. This was repeated nine more times. 

When we reached the tenth time through, we notched the pasta machine at setting #6 and rolled again. This process of notching down and rolling continued until we reached setting #3, which we thought might be the right thickness.

David cut the dough into 1 1/2 inch squares. At first I thought they looked pretty tiny, but once I rolled them out on the garganelli board, they were just the right size.


After rolling out each piece, the garganelli were placed on a baking sheet, lined with a lightly floured tea towel.

You can view short video at Cuisinivity to see how the rolling process works. I found that not much pressure was needed with the rolling pin, and that occasionally flouring the pin kept the dough from sticking to it.

The recipe states letting the completed garganelli dry, but not for how long. I checked them after a couple of hours and they seemed to have firmed up nicely.

I heated up some homemade pasta sauce, and cooked the pasta in a big pot of salted water. After combining the pasta into the sauce, it was time to plate.


It certainly looked good, but the final test would be the taste and texture. The good news is that we really like the taste of the garganelli. The bad news is that they seemed a tad thick and many of them collapsed.

We suspect that the pasta needs to be rolled out to setting #2 or maybe even #1. We also want to let them dry out more.

All in all, I will definitely be doing this pasta again. Hopefully my next attempt will bring perfection, or something close to it. 

UPDATE: I made this pasta again, but this time used dough that had a bit of wheat flour in it. Also, I let the pasta dry considerably longer. And the garganelli were turned over about half way through the drying time to ensure both sides were dry. When cooked, the pasta was as close to perfection that I think I can get. The garganelli held their shape and the wheat flour gave a nice bit of texture. Success is mine!