Showing posts with label bread. Show all posts

Friday, January 29, 2016

Crescent Rolls

I was trying to figure out what my next baking challenge should be and decided to tackle homemade crescent rolls. I love tasting all those buttery layers, and, as I want to try my hand at making croissants, crescent rolls seemed like a good starting point.

I landed on this recipe (courtesy of Half Baked Harvest), donned an apron, and was ready to spend my morning in the kitchen.

The first step was to make dough and chill it in the fridge for about 30 minutes.


Once sufficiently chilled, the recipe calls to place the dough on a lightly floured surface and roll the dough into a large rectangle. Now here's the thing -- we live in the tropics, so keeping the dough in a somewhat chilled state was going to be a challenge. 

I managed to get around this problem by first chilling a baking sheet in the freezer during the last 15 minutes the dough was chilling in the fridge. I turned the baking sheet upside down, dusted it lightly with flour, and it really helped keep the dough at a consistent temperature.

The other item that came to the rescue was my new kitchen toy -- an aluminum rolling pin!


It even has graduated measurements on both ends!


This beauty was also placed in the freezer with the baking sheet.

Here you can see the rolled out dough and it's spread with 8 tablespoons of softened butter.


 The next was to fold the dough into three layers.


I wrapped the dough in plastic wrap and placed it, the rolling pin, and the baking sheet in the freezer for 10 minutes.

When time was up, the dough was rolled out again into a rectangle, folded in three layers, then put back in the freezer for another 10 minutes. This process was repeated two more times. 

And just so you know, because the dough is chilled the rolling out process is a great workout for your wrists and arms. 

Once the final folding and freezing step was done, the dough was rolled out for the final time, cut into triangles, and rolled up.


The pan was covered with a towel and left to rise for about an hour.

When done resting, I brushed the rolls with egg wash, then the pan was placed into a pre-heated 400-degree oven for about 12 minutes.

And this is a sample of the lovely goodness that came out of the oven:


All those layers! And oh so buttery. I was very pleased with the result.

And let me just say that the rolling pin worked like a charm and worth every penny. It was true to its word of being non-stick, kept the chill for a good amount of time, and was a breeze to clean.

Looking forward to upping my game with croissants!


Wednesday, January 27, 2016

Oat and Wheat Sandwich Bread

I was getting a little bored making the same old recipe for sandwich bread. It's good and all that, but it was time to try something else. This recipe (courtesy of Smitten Kitchen) caught my eye, mostly for rolled oats being one of the ingredients.

Now a word of warning: this recipe is a two day affair. But with planning it is totally worth the time and effort.

To make the dough, it's just a matter of combining water, milk, honey, and yeast. An egg and oil gets added, then the flour*, oats and salt. Everything mixes together for about one minute, then the dough rests for 5 minutes. After resting, the dough gets mixed again for about two minutes.

After turning the dough out on a floured surface, knead it for just a bit, then pop it into a lightly oiled bowl.


Cover the bowl with plastic wrap and let the dough proof for about an hour.


Transfer the covered bowl to the fridge to ferment. This fermentation time can be just overnight or as long as five days, depending on when you want to bake the bread. I've just done it overnight thus far, but plan to try a three and five day ferment to see if there's a marked difference in taste.

Anyhow, when you're ready to bake the bread, divide the fermented dough into two equal pieces. Form the loaves and allow to proof for about an hour.


When this round of proofing is done, pop the pans into a pre-heated 350-degree oven and let bake for 35 to 40 minutes.


The end result is scrumptious! The crumb is tight, the crust is crunchy, and the rolled oats add a subtle texture to go along with the wheat flour. Providing my cooking and baking schedules allow, I plan to keep making this recipe on a regular basis.

*The recipe calls for 5 cups of whole wheat flour. I wanted to lighten it up a tiny bit and substituted 2 cups of all purpose flour, making the final amount for the wheat 3 cups. 


Friday, January 22, 2016

Cinnamon Swirl Raisin Bread

There's something about the aroma of cinnamon and sugar that always makes me feel warm, comforted, and hungry. When I saw this cinnamon bread recipe (courtesy of Tasting Table), I just knew it would be the perfect thing for my craving.

Before I started making the dough, I re-hydrated raisins in a little water. This way they would be plump and juicy. 

The dough preparation got underway by combining yeast, sugar, and water and letting it sit until foamy.

Milk powder, salt, re-hydrated raisins and flour were added and mixed together with a wooden spoon, until a shaggy dough formed. Then small pieces of softened butter were incorporated.

The dough was turned out on a lightly floured counter and kneaded for about 10 minutes. I formed the dough into a ball and put it into a lightly buttered bowl. Some plastic wrap went on the top and the dough was left to rise and double in size for an hour.


While the dough was on the rise, I combined some cinnamon and sugar and took a deep sniff. Immediate happiness. 

When the dough was ready, I flattened it out into a rectangle, then sprinkled the cinnamon and sugar combo on top.


Starting at the short end, I rolled the dough into a log, pinched the seam, and placed the dough log into a lightly greased loaf pan.


The plastic wrap was placed on top, and the dough rested for about another hour.

The now ready loaf was scored down the middle, brushed with some melted butter, and placed into a pre-heated 350-degree oven for 55 minutes.

The aroma coming from the oven was swoon-worthy and I want our kitchen to smell like that on a regular basis.


The recipe calls to let the bread rest for 30 minutes before cutting. Those were some of the longest 30 minutes of my life. But in the end, it was worth the wait. The outside has a lovely crunch and inside there are airy layers where the raisins and cinnamon sugar come together in a magical way. 

As tempting as it was to devour the whole loaf in one go, I wrapped the remainder in foil and put it in the fridge. The next day, we decided to have a couple slices for breakfast. When cutting the bread it felt almost on the stale side, but never fear. Once those slices were toasted all was well. 

I have a funny feeling this bread will become one of my regular, weekly baking items. YAY!


Friday, June 26, 2015

Singapore's Roti John

I was looking for something different and, dare I say it, a bit on the healthier side for dinner this week. So when this sandwich (courtesy of Honest Cooking) filled with a veggie omelet, cucumber, curry, and hot sauce appeared on my Facebook feed, well, I just knew I had to make it.

But here's the thing -- the recipe calls for serving all those luscious veggie bits on a baguette. This is not the type of bread commonly found in Corozal. What to do? Of course, make my own.

I've made baguettes in the past, but wanted to see what other recipes were out there to play with. I landed on this one (courtesy of Food Network). 

After mixing together all of the ingredients, proofing the dough for about 30 minutes, it was time to shape the baguettes.

Whatcha' think?


Looking pretty fine, if I don't say so myself.

After resting for another 25 minutes, it was time for the oven, which was pre-heated to 450 degrees. I had put an oven-proof pan on the bottom rack during the pre-heat and, when ready to bake the bread, threw some ice cubes into the pan, quickly put the bread in, and shut the oven door.

The baguettes only needed about 15 minutes in the oven before they were done.


Ooooh...ahhh! Immediately out of the oven, the crust was nice and crispy. However, it started turning soft as the bread cooled. I'm fairly sure the reason this happened is that I should have cranked the heat up in the oven during the pre-heat stage, then lowered the temp down once the bread was put in. 

As I plan to make more of these in the future, there will be plenty of opportunities to perfect the crust.

Moving on...time to make the Roti John.

Here's what went into the prep:


On the cutting board, there are thin sliced cucumber, onion, and green pepper. Behind the cutting board, there's a bowl with some mayo mixed with a good hit of sriracha. Next to that is the bowl containing small chunks of onion, green pepper, and mushrooms. Next door is the bowl containing four lightly beaten eggs. Oh, and of course one of the baguettes.

With the prep out of the way, it was an easy thing to saute the chopped veggies, then add some curry powder, and chopped cilantro. When that mixture cooled, I mixed in the eggs.

The veggie/egg mixture was then ladled into a non-stick pan and the sliced baguette was pressed gently on top to sop up some of the egg. In about a minute, the egg mixture was done, so I flipped the baguette over to warm the other side.

When done, I finished the sandwich by schmearing the mayo/sriracha mix on one side of omelet, layered on the sliced onions, green pepper, and cucumber.

Voila!


In spite of the baguette not having a crispy crust, this sandwich was awesome! Having two textures of the veggies -- thin sliced and chunks -- was a treat, and that mayo? What a great pop of flavor. I will definitely be making this again. 

It's actually the type of sandwich I would love to see in some restaurant here. It's full of flavor, nothing is fried, and is easy to pull together using ingredients that are readily available. And while baguettes are not something everyone wants to make, I think this combo could work even on a toasted bun.

White Sandwich Bread

My bread baking bonanza continues. A couple of weeks ago, I knocked out a batch of focaccia, then shortly after decided to make ciabatta. Still looking for a challenge, I decided to try my hand at white sandwich bread.

I found this recipe created by Julia Child. There is nothing wild or crazy about the ingredients or the technique. If you have ever made a loaf of bread, you'll recognize the steps of proofing the yeast, adding the flour, a bit of butter, and salt and mixing everything together to form a smooth and elastic ball of dough.

There are two proof cycles for the dough, which will take a total of about 2 - 2 1/2 hours. I will say by the end of the second cycle the bread puffed nicely above the lip of the loaf pan.

The bread bakes in a pre-heated 375 degree oven for about 30 minutes.

This is what mine looked like straight out of the oven:


It had good coloring and a nice, uniform shape. When the loaf had cooled, I sliced it to take a look at the crumb.


Not as uniform as I would like, but it was my fault in how I formed the loaf. The overall taste was good, far better than store bought. However, I was bit underwhelmed. Maybe it's because we don't normally eat white bread for sandwiches, so am not accustomed to the taste. I will say it does toast up well and, spread with a bit of homemade butter, it makes a nice snack.


Thursday, June 18, 2015

Ciabatta

While I usually crank out a couple loaves of whole wheat sandwich bread every other week, I was in the mood to do something different. Enter ciabatta.

This bread takes some time to make, but the effort is totally worth it. The night before making the dough, I got the biga, or starter, going.


I combined 1 cup of flour, 1/8 teaspoon of instant yeast, and 1/2 cup of room temperature water. All that got stirred around, then the bowl was covered with cling wrap and left to stand overnight.

The next morning, I put the biga into the bowl of my stand mixer, then added 2 cups of flour, 1/2 teaspoon of instant yeast, 1 1/2 teaspoons of salt, 3/4 cups of water, and 1/4 cup of milk. The water and milk were at room temperature.

Starting with the paddle attachment, the dough mixed at low speed until it was roughly combined and shaggy looking. It was unbelievably humid the day I made the dough, so I found that a bit more flour was needed to get the mixture to the right consistency. I scraped down the sides of the bowl, then continued mixing on medium-low speed until the dough started to collect on the paddle. I changed over to the dough hook and and kneaded the dough for about 10 more minutes.


Now came the fun part -- transferring the dough to a bowl. This dough is extremely sticky. I did find that spraying the pastry scraper with some cooking spray helped.

The bowl was covered with cling wrap and the dough was left to rise for about an hour.

When it had doubled in volume, I sprayed the scraper again, and folded the dough over itself. After turning the bowl 90 degrees, it got folded again. I kept turning the bowl and folding until eight turns were completed.

The cling wrap was put back on the bowl and the dough rested for another 30 minutes. Then the whole turn the bowl, fold the dough was done again, and another 30 minute resting.

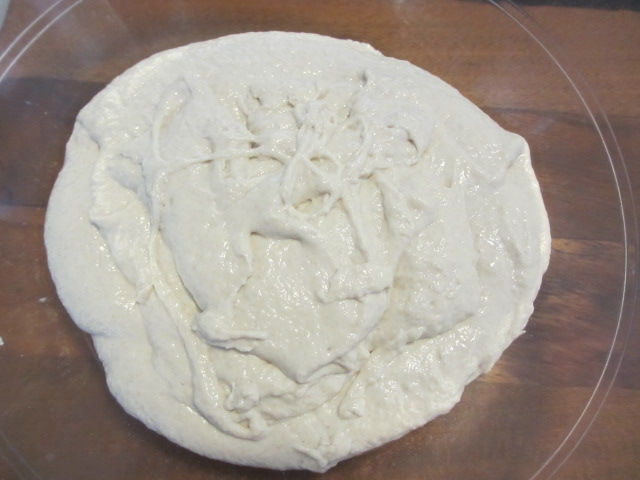
This is what the dough looked like at this point in the process. It's a bit difficult to see, but if you look close you can see that bubbles have formed, which is a good thing.


I cut two pieces of parchment paper and put lots of flour on them, as well as liberally dusting the counter. 


After turning the dough out on the counter, I cut it in half, formed my loaves, and placed them on the parchment paper.


Before popping the dough into a pre-heated 450 degree oven, I spritzed the top of the loaf with water. Once the loaf was in the oven, it got spritzed again.

After baking for about 24 minutes, the bread was ready to come out of the oven.


I love the crispiness of the crust and chewiness inside. This isn't the type of bread recipe I plan to make all the time, but it certainly is a tasty change of pace.

Saturday, April 18, 2015

Casatiello - Italian Easter Bread

When I saw this recipe (Alimentari), there was no doubt in my mind I wouldn't give it a try. I mean bread stuffed with meat, eggs, and cheese? Wow.

First step was to make the dough. For this go round, I opted for lard over butter. Once the dough went through its two rises, I rolled it out.


Next up, were the fillings. 


I was able to score some salami, but subbed bacon for the pork cracklings. All of this was sprinkled on the dough...


...then topped with some grated Parmesan.

I rolled the dough into a cylinder shape and popped it into a spring form pan.


The pan went into a pre-heated 355-degree oven and baked away for an hour.

I served it warm that night for dinner and we both thought the dough to be lighter and flakier than expected. This was a good thing. The filling components all worked very well together, especially the hard boiled eggs. A couple of days later, I served it at room temperature, and it was still just as delicious. 

But besides the taste, I really like this recipe for its versatility. The filling ingredients could be just about anything your heart desires. And because it can be served warm or at room temp, it can be a great brunch or dinner dish or even an appetizer. 

Looking forward to indulging my imagination and making this recipe again. Hmmm...I bet schmearing the dough with basil pesto might be nice.

Saturday, March 14, 2015

Buttermilk Banana Bread

Now that I am on a tear making my own cultured butter, I wanted to play around with the reserved buttermilk.

Believe it or not, the first day I made butter, this recipe appeared on my News Feed from the I Am Baker website. Coincidence? Hmmm...

I got to work.

First I sifted together the flour, baking powder, baking soda, and salt.

Next came creaming my butter and sugar, then adding the eggs, one at a time. The buttermilk and vanilla joined the party and everything whisked away until just combined.

The flour didn't want to be left out, so that got added into the mix, again until just combined.

I had already thawed out some mashed bananas that were hanging out in the freezer and folded them into the batter.


Into a greased and floured loaf pan, and it was time for the oven.


It took about 55 minutes for the bread to bake and for a toothpick to come out clean.

The taste? Moist and not over-the-top sweet. My kind of bread. It must have been something others liked, 'cause there wasn't one piece left from the slices I took over to our weekly pool party.

Friday, January 30, 2015

Whole Wheat Sandwich Bread

From time to time, it's near impossible to find a loaf of wheat bread. It's one of those things like butter that will disappear from grocery shelves for a bit. I decided it might be high time for me to try making my own loaves using this recipe. 

Local honey and Fermipan yeast

While the directions call for putting the water into the bowl of a standing mixer and sprinkling the yeast over top, I prefer doing it in a measuring cup and adding the honey. This way I can ensure the yeast proofs.

As the yeast proofs away, I put the milk and oil in the bowl of the stand mixture...


...and measure out the all-purpose flour. Here in Belize, I use Bebe Agua.


The proofed yeast gets poured into the mixing bowl that has the milk/oil mixture.


Then the all purpose flour gets added to the mix and using the dough hook, everything gets a quick mix.

In the meantime, the whole wheat flour gets measured. As an aside, this is the only wheat flour I've found in Corozal. It works just fine, but it would be fun to source other brands and see how they do.


The wheat flour gets dumped into the bowl and the dough hook gets put to work again to create a shaggy dough.


This all sits, undisturbed, for 20 minutes to let the flour absorb the liquids.

When the time is up, the dough hook goes to work again to knead the dough for about 8 minutes. 

What you get is a lovely ball of dough that is just a bit tacky.


I divide the dough in half and put each piece in lightly oiled bowls.


After covering the bowls with plastic wrap, I put them in my unheated oven for about an hour. This keeps them out of any drafts.

When doubled in bulk, the dough gets turned out on a lightly floured board, shaped into loaves, and placed in their pans that have been coated with cooking spray.


Now it's time for their second rise. I put a dampened tea towel over the pans and put them back in the unheated oven for about 30 minutes.

Here they are after the second proof:


I use a serrated knife to make a slit down the middle, then pop the pans into a pre-heated 425 degree oven.

As soon as I shut the oven door, the heat gets lowered to 375 degrees.

After baking for about 30 minutes, this is what you get:


The result? Using this recipe I may never buy whole wheat bread again. There's a slightly sweet taste and the crumb/density is perfect for sandwiches. And when slices are toasted? Oh man, it just seems to bring out all the flavors.