skip to main |
skip to sidebar
Now that I've been making my own butter, I wanted to step things up a notch. Do something fun. Something pretty.
So I ordered a silicone butter mold.
After making the latest batch of butter, I simple smushed it into the mold and popped it into the fridge for a few hours.
When the butter was firm, I popped the molds out.
How cute are these? I think they would be great to take to a dinner party, along with some homemade bread. But really, no special occasion is needed to appreciate butter whimsy.
In my last post, I shared how to make quick and easy butter. A Facebook friend, Noelle, commented that her husband makes cultured butter. Intrigued by this, I started reading up on the subject. Apparently cultured butter has a tang to it and is smooth and glossy looking. Plus it takes a bit of planning and time (mostly unattended).
And here are some other fun facts to know and tell:
- Raw or pasteurized cream can be used
- If using pasteurized, it will need some sort of culture added to the cream, such as mesophilic yogurt, cultured buttermilk, or Milk Kefir Grains.
- If using raw cream, it will culture all on its own at room temperature.
I lucked out because I had raw cream at my disposal. So let's see how this kitchen adventure unfolded.
For this butter round, I used four bags of cream (about 30 ounces). The bags were poured in a bowl and stood at room temperature for about 20 hours.
I could tell once time was up that something had been going on. The cream went from a thick, fluid state to being set. The bowl got popped into the fridge for five hours to stop the culturing process.
To give you some idea how thick the cream got, here's what a scoop of it looked like after coming out of its refrigerator hibernation:
I must admit that I was tempted to just stop the recipe process right then and there. The cream looked so, ummm, creamy and delicious, and just screaming to be spread on some lovely warm bread. But being the intrepid kitchen maven, I got a hold of my senses and soldiered on.
Knowing how much liquid came out of my original butter batch, I figured it would be best to divide this batch in half.
So half of the cultured cream got put into the bowl of the standing mixer. Using the whisk attachment, beating commenced. Here is the cream when it hit soft peak stage:
Keeping the mixer on about medium speed, the cream continued to whip until I saw the water beginning to separate. At that point, I backed down the mixer speed. Most of the solids worked themselves into the whisk:
Using a rubber spatula, the butter was removed from the whisk and plopped into a large bowl. Using a slotted spoon, I was able to retrieve any whipped bits that were still in the bowl.
The liquid that was in the bottom of the bowl, the buttermilk, got poured into a measuring cup.
I repeated the whipping process with the remaining cream.
The final amount of buttermilk that was extracted:
With the full batch whipped and now in the bowl, I poured some purified water over the butter.
I used a wooden spoon to rather smush up (a technical term dontcha' know) the butter to extract the remaining buttermilk. After smushing for a bit, the water got poured off and clean water was put in. I repeated the smushing process until the water was clear and the last traces of buttermilk were gone.
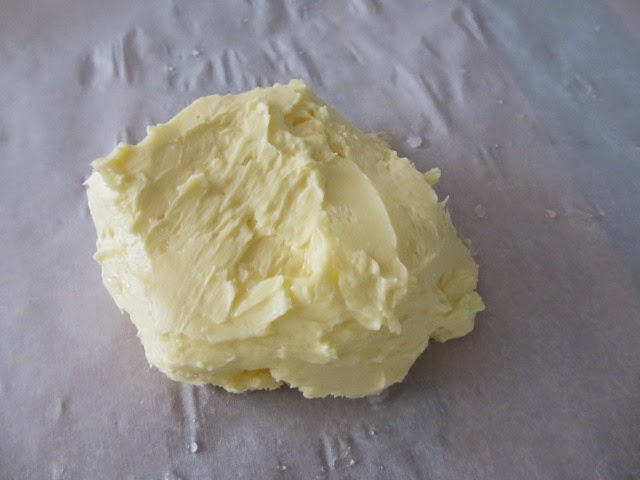
Not having any fancy-schmantzy butter molds, I free-formed a block of butter on a piece of parchment paper:
The final yield of butter was about 13 ounces from the original 30 ounces of cream.
Without a doubt, this butter was smooth (ignore my spatula marks) and glossy. I had already taken the quick and easy butter that was made the day before out of the fridge. Now it was time for the taste test.
David and I tried the quick and easy butter first. And guess what? It tasted like butter! Then we sampled the cultured version. This one was richer, a bit more tangy, and a delight. I can't wait to see if we notice any difference when I cook and bake with it.
David wondered if the taste difference was substantial enough to warrant the extra time. I think it is. But I will say that if I'm in a hurry, have raw cream on hand, and need butter right away, the quick and easy method will be the way I go.
Noelle, thank you for introducing me to another level of butter heaven.
But before ending this post, I have some notes that may possibly be of some use for those looking to try this recipe:
- I initially put the cream on the counter, covered with a couple of colanders. This was mostly to keep the cat princess, Bronte, from taking a sample. Later in the day, I put the bowl into an unheated oven to ensure the cream was cat proof.
- Now that warmer weather is setting in, I may need to shorten the time of leaving the cream to culture at room temperature.
- Remember that buttermilk that I reserved? Well call it providence, karma, fate, whatever, but while my butter was doing it cultural thing, a recipe for banana buttermilk bread appeared on my Facebook news feed. Will be making that in the next day or two and will post results.
- Butter molds are in my future.
One of the quirks of living in Corozal is that there are times when certain grocery store items disappear from the shelves. Right now, the missing item is butter.
This is the brand I use.
Actually, it's about the only brand to choose from, unless you prefer margarine or canned butter.
During a previous butter shortage, I did try the canned stuff. But I really didn't like the taste.
Instead of waiting and hoping for the reappearance of butter, I decided to make my own.
It's dead easy and fast to do.
I took two bags of cream and poured them into the bowl of my standing mixer.
Using the whisk attachment, I beat the cream on medium speed. It started to thicken, go into a whipped state, then the water started to separate from the solids. At that point, I lowered the mixer speed, so as to not have the water flying about outside the bowl.
I put the solids in a cheesecloth lined colander and let it finish draining off any remaining water.
End result? Badda Bing, Badda Bam, Butter!