Monday, July 13, 2015

Sophisticated Saltines

Ever have a yen for something to nibble on while watching television, sharing some beverages with friends, or just because you want a snack? I have a solution.


Some saltine crackers. Yes, crackers. But wait...they go from same old, same old saltine's to awesome in just about 20 minutes. And here's how:
  • Melt a stick of butter.
  • When cool(ish), dip crackers in the butter making sure both sides are coated.
  • Place the buttered crackers on a rack, set on top of a baking sheet lined with parchment paper.
  • Sprinkle the dried seasonings of your choice (I used an Italian spice mix for this go round).
  • Put crackers in a pre-heated 275 degree oven for about 20-25 minutes.

DONE!

The butter and seasonings give the crackers a zing, while you still retain that delightful, crispy crunch.

Want to add another level of class to this not-so-humble cracker? Add a schmear of roasted tomato spread over the top. Wowza.

I can't wait to try different herbs and spices on the crackers. Herbs de Provence, maybe some sort of curry powder, or maybe some Chinese Five Spice? There's no limit to the directions you can take these babies.

Butter Molds

Now that I've been making my own butter, I wanted to step things up a notch. Do something fun. Something pretty.

So I ordered a silicone butter mold.

After making the latest batch of butter, I simple smushed it into the mold and popped it into the fridge for a few hours.

When the butter was firm, I popped the molds out.


How cute are these? I think they would be great to take to a dinner party, along with some homemade bread. But really, no special occasion is needed to appreciate butter whimsy.

Roasted Tomato Spread

I've roasted fresh tomatoes before and really liked the taste. But sometimes, when tomatoes aren't in season or the ones that are available aren't bursting with flavor, it's time to think outside the box...or maybe I should say can.

Yep, you can take canned whole tomatoes to a whole new level of taste by roasting them.

I used two cans of whole tomatoes and drained off the juice. You can reserve the juice and use it in sauces or sub it for water/stock when making rice. 

The tomatoes were sliced in half and placed on a sheet pan lined with parchment paper.

Olive oil was drizzled on top, as well as some Italian seasonings. The sheet pan got popped into a pre-heated 350 degree oven for about an hour.

When done, the tomatoes had carmelized a bit and turned a darker shade of red.


They also smelled amazing.

A few quick pulses in the food processor and the spread was done.


The flavor is rich and the concentrated tomato taste just pops. This makes a great spread for a sandwich, but would also be great as a base for a tomato soup.

Quick, easy, and delicious!

Friday, July 3, 2015

Lasagne Bolognese

So right off the bat, I'm going to let you know that this lasagne recipe (courtesy of epicurious) takes time. However the outcome from this labor of love is worth every step, every ingredient, every minute you spend preparing it. Also, almost all of the components can be made in advance.

The day before I wanted to serve the lasagne, I got to work on making the sauces. First up was the Bolognese.

I chopped onion, celery, and carrot, popped them into the food processor, and buzzed them around until finely chopped.

In a large pan, I added ground beef, ground pork, bacon (the recipe calls for pancetta, but it's not available here), and the veggies. All of this was left cook until the meat was well browned. That took about 30 minutes.

Wine was added to the pan and the brown bits got scraped from the bottom. Milk was then added and left to simmer until almost completely evaporated. Then tomatoes joined in, along with homemade chicken stock. Everything got a good stir, and was left to simmer for about three hours.

When the sauce was finished, I set it aside to let it cool. It would then be put in the fridge overnight. And trust, you want to give it time to meld together.

With the Bolognese cooling away, it was time to start on the Bechamel. I warmed up milk in a saucepan and used another pan to melt the butter. Once it started to foam, flour was added and whisked for about a minute. The warm milk got whisked in, about 1/2 cup at a time. The sauce was then brought to a boil, the heat then reduced, and allowed to simmer for about 10 minutes. I added some grated nutmeg and salt, gave everything another whisk, and removed the pan from the heat. After transferring the sauce to a bowl, I pressed plastic wrap directly onto the surface of the sauce. This prevents a skin to form. Once cooled, the Bechamel joined the Bolognese sauce for an overnight nap.

As an aside, you've probably noticed that more than a few pots and pans are needed for this dish -- much to the chagrin of my dishwasher, David.

The next day, I tackled the lasagne noodles. The dough is comprised of flour and eggs. That's it! The dough got needed until smooth.

It was then wrapped in plastic and left to rest for about two hours. When ready, the fun really began.

David and I set up the pasta machine and started rolling out the dough sheets. Now this is something that can be done by one person, but it's faster and easier with two people. 

We needed 16 8"-long noodles. As we were rolling and cutting, a very loud thunderstorm was underway. That meant we had three dogs milling around being nervous. As for the cat? She is fascinated by watching pasta being rolled out, so we had to keep shooing her away.


As the sheets were cut, they were placed on stacked pieces of parchment paper. When we achieved the requisite number, I covered the pan with plastic wrap and popped the pan in the fridge.

Later that afternoon, it was time for the assembly. 

The first step was reheating the sauces. While they were coming up to temp, the lasagna noodles needed to be blanched and shocked in ice water.

Bechamel on back burner, Bolognese in the front


Blanching and shocking lasagne noodles
After taking the noodles out of the ice bath, they were layered on a sheet pan covered in paper towels.

Moving on to the home stretch...

With the noodles made and the sauces heated, the final assembly could begin.

Some Bechamel sauce was ladled into a butter pan.


A layer of noodles were put on top, then some Bolognese was ladled on. 


Some more of the Bechamel was added, along with a bit of grated Parmesan. 

This layering process was repeated seven times.

The pan was put into a pre-heated 350 degree oven and left to bake for about 60 minutes.

The lasagne was left to cool for 45 minutes. This is a really important step and don't worry that it won't still be hot. It will be.

And finally, the plating...


There are so many elements that we love. I think, first and foremost, are the noodles. They are so thin and don't overwhelm the dish. In turn, the sauces really shine. The Bolognese is rich and all those meat elements marry together perfectly. The Bechamel also adds a richness quotient, but in a more subtle way. 

In every way, this dish is time well spent. 

Sticky Chicken

On days when the thought of firing up the stove or oven makes you question your sanity, dig out your slow cooker instead. In a matter of four short hours, you can serve up a batch of sticky chicken (courtesy of Six Sisters' Stuff).

Now while the recipe calls for chicken wings, neither David or I really love them. Instead, I used skinless chicken thighs. But I'm getting a bit ahead of myself.

Let's start with the sticky part, which contains all matter of goodness.

Honey, brown sugar, balsamic vinegar, soy sauce, garlic cloves, ground ginger, and some hot sauce all get put into a sauce pan and cooked for about 5 minutes. You want the sugars to dissolve and the sauce to thicken.

Let it cool down for a bit, then pour it over your chicken that you already have put in the slow cooker.


Pop the lid on the cooker, turn the heat to high and go off and enjoy a cold beverage. After about two hours, turn the chicken pieces over, return the lid to the cooker, and let it continue to cook for another two hours. 

When the chicken has finished cooking, remove the pieces to a plate. Mix together some cornstarch and water, pour it into the cooker, and give it a stir. Return the chicken to the cooker and let it cook for about 10 minutes. You should notice that the sauce has thickened up.

Now it's time to eat!


I served the chicken on a bed of rice and garnished with some sesame seeds, chopped cilantro, and some of the sauce. This dish is really love at first bite. The chicken came out fork tender and packed with flavor. Granted, it's a teeny bit on the sweet side, but the soy sauce and hot sauce balance it out. 

Remember a slow cooker can be your best friend when temperatures start getting out of hand.

Friday, June 26, 2015

Singapore's Roti John

I was looking for something different and, dare I say it, a bit on the healthier side for dinner this week. So when this sandwich (courtesy of Honest Cooking) filled with a veggie omelet, cucumber, curry, and hot sauce appeared on my Facebook feed, well, I just knew I had to make it.

But here's the thing -- the recipe calls for serving all those luscious veggie bits on a baguette. This is not the type of bread commonly found in Corozal. What to do? Of course, make my own.

I've made baguettes in the past, but wanted to see what other recipes were out there to play with. I landed on this one (courtesy of Food Network). 

After mixing together all of the ingredients, proofing the dough for about 30 minutes, it was time to shape the baguettes.

Whatcha' think?


Looking pretty fine, if I don't say so myself.

After resting for another 25 minutes, it was time for the oven, which was pre-heated to 450 degrees. I had put an oven-proof pan on the bottom rack during the pre-heat and, when ready to bake the bread, threw some ice cubes into the pan, quickly put the bread in, and shut the oven door.

The baguettes only needed about 15 minutes in the oven before they were done.


Ooooh...ahhh! Immediately out of the oven, the crust was nice and crispy. However, it started turning soft as the bread cooled. I'm fairly sure the reason this happened is that I should have cranked the heat up in the oven during the pre-heat stage, then lowered the temp down once the bread was put in. 

As I plan to make more of these in the future, there will be plenty of opportunities to perfect the crust.

Moving on...time to make the Roti John.

Here's what went into the prep:


On the cutting board, there are thin sliced cucumber, onion, and green pepper. Behind the cutting board, there's a bowl with some mayo mixed with a good hit of sriracha. Next to that is the bowl containing small chunks of onion, green pepper, and mushrooms. Next door is the bowl containing four lightly beaten eggs. Oh, and of course one of the baguettes.

With the prep out of the way, it was an easy thing to saute the chopped veggies, then add some curry powder, and chopped cilantro. When that mixture cooled, I mixed in the eggs.

The veggie/egg mixture was then ladled into a non-stick pan and the sliced baguette was pressed gently on top to sop up some of the egg. In about a minute, the egg mixture was done, so I flipped the baguette over to warm the other side.

When done, I finished the sandwich by schmearing the mayo/sriracha mix on one side of omelet, layered on the sliced onions, green pepper, and cucumber.

Voila!


In spite of the baguette not having a crispy crust, this sandwich was awesome! Having two textures of the veggies -- thin sliced and chunks -- was a treat, and that mayo? What a great pop of flavor. I will definitely be making this again. 

It's actually the type of sandwich I would love to see in some restaurant here. It's full of flavor, nothing is fried, and is easy to pull together using ingredients that are readily available. And while baguettes are not something everyone wants to make, I think this combo could work even on a toasted bun.

White Sandwich Bread

My bread baking bonanza continues. A couple of weeks ago, I knocked out a batch of focaccia, then shortly after decided to make ciabatta. Still looking for a challenge, I decided to try my hand at white sandwich bread.

I found this recipe created by Julia Child. There is nothing wild or crazy about the ingredients or the technique. If you have ever made a loaf of bread, you'll recognize the steps of proofing the yeast, adding the flour, a bit of butter, and salt and mixing everything together to form a smooth and elastic ball of dough.

There are two proof cycles for the dough, which will take a total of about 2 - 2 1/2 hours. I will say by the end of the second cycle the bread puffed nicely above the lip of the loaf pan.

The bread bakes in a pre-heated 375 degree oven for about 30 minutes.

This is what mine looked like straight out of the oven:


It had good coloring and a nice, uniform shape. When the loaf had cooled, I sliced it to take a look at the crumb.


Not as uniform as I would like, but it was my fault in how I formed the loaf. The overall taste was good, far better than store bought. However, I was bit underwhelmed. Maybe it's because we don't normally eat white bread for sandwiches, so am not accustomed to the taste. I will say it does toast up well and, spread with a bit of homemade butter, it makes a nice snack.


Thursday, June 25, 2015

Braised Chicken with Tomato

There are certain chefs I really admire and trust when it comes to their recipes. Alex Guarnaschelli is one of my favorites. She brings so many flavors to the table and her recipes never disappoint.

That's why I knew this chicken recipe was going to be a winner.

The first step was to brown the chicken for about 4 minutes a side.


Once both sides were done, I removed them from the pan and set them aside.

While the chicken was browning, I prepped the onions, garlic and ginger. 


Before adding them to the pan, I toasted up some cumin seeds and chili flakes. The aroma was swoon-worthy.

The onions, garlic, and ginger joined the party, some salt was added, and everything was given a good stir to combine.

Tomatoes, cinnamon and bay leaves were added and the mixture simmered for about 10 minutes.


The chicken was added back to the pan and the whole shootin' match continued to simmer for about 40 minutes. Really, you need to inhale the smell of all this. Your mouth will be watering.

After the chicken was cooked through, I removed the cinnamon and bay leaves.

Now here's where I deviated from the script a bit. I removed the skin from the chicken and, in a separate pan, browned it up until crispy. Many thanks to Sonja Jamison for that great tip.


Dinner was ready!


I spooned some of the luscious, rich sauce over the chicken, served some rice, and sprinkled the crispy chicken skin and some cilantro over the top.

Oh my!  

Pappardelle with Artichokes and Shrimp

This dish is a great example of adapting ingredients to achieve a tasty meal. When I saw this recipe (courtesy of Alimentari),the combination of flavors sounded great.

Right off the bat, I knew scoring raw artichoke hearts wasn't going to happen. But we can get artichoke hearts in cans and jars, so that part of the recipe could be checked off.

The pappardelle? Well some type of dried pasta would work in its place, but I decided to make my own. 

With the pasta made and cut, it was just a matter of bringing all the pieces and parts together.

I cut up the jarred artichokes and set them and the liquid they were jarred in to the side. White wine and garlic were put into a saute pan and allowed to reduce (keeping an eye on the garlic that it didn't burn).

In the meantime, I got water going to cook the pappardelle. 

When the wine had reduced in the saute pan, I added a bit of olive oil to the pan and tossed in the shrimp. In no time at all the shrimp turned pink, and the reserved chopped artichokes and liquid were added to the pan.

The cooked pasta was then tossed in and it was time to eat.


David and I agreed that the pappardelle was cut just a tad too wide, but other than that we really liked this dish. The acidity of the artichokes is nicely balanced out by the wine reduction. 

Thursday, June 18, 2015

Ciabatta

While I usually crank out a couple loaves of whole wheat sandwich bread every other week, I was in the mood to do something different. Enter ciabatta.

This bread takes some time to make, but the effort is totally worth it. The night before making the dough, I got the biga, or starter, going.


I combined 1 cup of flour, 1/8 teaspoon of instant yeast, and 1/2 cup of room temperature water. All that got stirred around, then the bowl was covered with cling wrap and left to stand overnight.

The next morning, I put the biga into the bowl of my stand mixer, then added 2 cups of flour, 1/2 teaspoon of instant yeast, 1 1/2 teaspoons of salt, 3/4 cups of water, and 1/4 cup of milk. The water and milk were at room temperature.

Starting with the paddle attachment, the dough mixed at low speed until it was roughly combined and shaggy looking. It was unbelievably humid the day I made the dough, so I found that a bit more flour was needed to get the mixture to the right consistency. I scraped down the sides of the bowl, then continued mixing on medium-low speed until the dough started to collect on the paddle. I changed over to the dough hook and and kneaded the dough for about 10 more minutes.


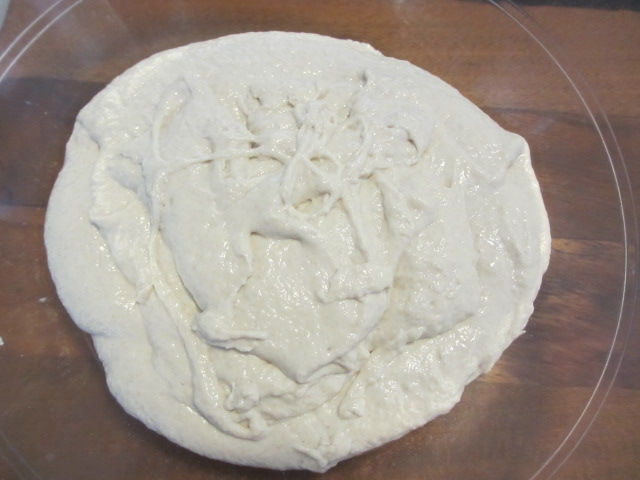
Now came the fun part -- transferring the dough to a bowl. This dough is extremely sticky. I did find that spraying the pastry scraper with some cooking spray helped.

The bowl was covered with cling wrap and the dough was left to rise for about an hour.

When it had doubled in volume, I sprayed the scraper again, and folded the dough over itself. After turning the bowl 90 degrees, it got folded again. I kept turning the bowl and folding until eight turns were completed.

The cling wrap was put back on the bowl and the dough rested for another 30 minutes. Then the whole turn the bowl, fold the dough was done again, and another 30 minute resting.

This is what the dough looked like at this point in the process. It's a bit difficult to see, but if you look close you can see that bubbles have formed, which is a good thing.


I cut two pieces of parchment paper and put lots of flour on them, as well as liberally dusting the counter. 


After turning the dough out on the counter, I cut it in half, formed my loaves, and placed them on the parchment paper.


Before popping the dough into a pre-heated 450 degree oven, I spritzed the top of the loaf with water. Once the loaf was in the oven, it got spritzed again.

After baking for about 24 minutes, the bread was ready to come out of the oven.


I love the crispiness of the crust and chewiness inside. This isn't the type of bread recipe I plan to make all the time, but it certainly is a tasty change of pace.

Tuesday, June 16, 2015

Chicken Salad with Cranberries

Whenever I roast off a whole chicken, I usually use some of the leftovers to make chicken salad. And boy, were there leftovers this time around. I scored a bird weighing in over 7 pounds at Caribbean Chicken! That's the biggest one I ever saw since we moved here.

Anyhow, the chicken salad...


This particular recipe is a favorite of ours. 

Here's what you will need:

4 cups of cubed cooked chicken
1 large celery rib, cut into 1/4-inch slices
3 tablespoons of finely chopped onion
1 cup of dried cranberries
3/4 cup mayonnaise
3 tablespoons red wine vinegar
Salt and pepper to taste

Mix all ingredients together and let it hang out in the fridge for a bit so all those yummy tastes have a chance to come together.

I love the vinegar element in this salad, because it gives a subtle kick. And the cranberries offer a delightful pop of sweetness.

Don't be afraid to change the proportions to your liking. Some people might like more mayo or celery. Some folks might want to up the vinegar a tad.

This a great dish all on its own. But it's also great filling in a tortilla or lettuce wrap. Give it a whirl.

Sunday, June 7, 2015

Chocolate Roulade

I had been on the lookout for something different to make as a dessert. So when this recipe (courtesy of mon petit four) appeared on my Facebook feed, it looked so pretty that I knew I had to try it.

The first thing I did was to line my sheet pan with parchment paper. I find that applying a light spritz of cooking spray to the bottom of the pan helps keep the parchment paper in place.

Next I whipped up the egg whites until they achieved wet, soft peaks.


The egg whites got set aside and I started whisking the egg yolks and sugar until they turned pale yellow. Then I sifted and whisked the dry ingredients together.


The dry ingredients were combined with the egg yolk/sugar mixture, then the egg whites were folded in.


So far, all was going to plan. I poured the mixture into my prepared pan, smoothed it out, and popped the pan into a pre-heated 425 degree oven. After three minutes, I rotated the pan, then set the timer for three more minutes to test for doneness. The cake seemed to be done, but there wasn't as much spring to it as I had hoped. 

This is the point where the wheels started to fall off, a bit. 

Per the recipe's instructions, I let the cake cool for a couple of minutes, then turned it out on a kitchen towel that had been sprinkled with confectioner's sugar.

I peeled off the parchment paper, then oh-so-gently, rolled the cake in the towel and let it cool.

Once cooled, I unrolled the cake.


Dagnabit! The cake cracked. I suspect I might have over-baked by about 30-45 seconds. It was apparent, to even the most casual observer, the final outcome was not going to be overly pretty.

Moving on, I whipped up the cream, confectioner's sugar, and vanilla. That got spread on the cake.


It was time to roll it back up.


Okay, looking down on it, the cake didn't look too bad. But you really need to see it from the side.


Oy. Clearly lost some major style points on this one.

The upside? My faithful testers thought it tasted just grand and they really seemed to like the richness of the cream. Also, everyone seemed to be in favor of being guinea pigs again as I experiment with the cake side of things. Am thinking something more of a sponge cake might do the trick. Will let you all know how that goes in an upcoming post.

Egg Crepes, Avocado, Tomato, and Bacon Sandwiches

Recently I made a batch of focaccia and decided to use some it as the base for this favorite sandwich of ours.


First I made the egg crepes, which are dead simple to do.

  • Whisk two large eggs with a splash of water until well combined.
  • Pour 1/4 cup of the egg mixture into a pre-heated crepe pan and let cook for about 30 - 45 seconds.
  • Remove the crepe from the pan and place on a piece of parchment or wax paper. 
  • Repeat with remaining egg mixture.

With the crepes out of the way, I fried up some bacon, sliced up tomatoes, and mashed up an avocado.

Schmear the mashed avocado on both sides of the bread, layer on the crepes, tomatoes, and bacon.

Voila!

Just as an aside, I've also used basil pesto instead of avocado and it's terrific.


Cucumber Mango Salsa and Burgers

It's mango season, so the perfect time to whip up a refreshing salsa. I gave this recipe a try (courtesy of oh my veggies), and it didn't disappoint. We don't have English cucumbers here, so I just used a regular one and scooped out the seeds before dicing it up. The slight bite of the cucumber and red onion is nicely balanced with the sweet mango.


To spiff up the presentation a bit, I hollowed the remaining pieces of cucumber and spooned in some of the salsa. 


I served the salsa with burgers made from a 50/50 mix of ground beef and pork. While making burgers is pretty straightforward, I found the technique used by Michael Symon for his Lola Burgers to be the best.

The key is to keep the meat mixture on the looser side and not make dense patties. Season with salt and pepper, then put the patties on a grill (preheated to medium high) for 3 minutes a side.

What you get are moist, juicy burgers that are medium-rare (our favorite).


And while I have made the Lola burger before and just adore them, this time I decided to serve our patties with some perfectly ripe avocado. 

Salsa + Burgers = Summer on a plate

Thursday, May 28, 2015

Mexican Chopped Chicken Salad

When the heat and humidity come to play, or when our social schedule gets crazy, or when I just want to make a quick and easy meal, salad is usually the answer. 

This recipe (courtesy of Mel's Kitchen Cafe) has become one of our favorites.
Mexican Chopped Chicken Salad
Let's start with the dressing. The combo of vinegar (I use apple cider) and honey is a winner right off the bat. But when you add the cumin and oregano, wow! I often make a double batch and keep it the fridge. It's a great condiment to have not only on salads, but drizzled on sandwiches as well.


As for the salad, there are so many tasty elements involved. Between the chicken, corn, black beans, onions, olives, bell pepper, lettuce, and cilantro, there's a whole party going on.

Quick side note: I like to buy a couple of packages of boneless, skinless chicken breasts and saute them all up. When cooked and cooled, I pop them into zippy bags then put them in the freezer. I find it makes recipes like this even easier, and you can always use the pre-cooked chicken for other meals.

I highly recommend making this recipe in advance and letting it chill out for up to eight hours. The flavors really come together the longer you can resist not scarfing it down.

If you do have any salad left over, you might want to consider putting it a tortilla. It's another great lunch or dinner option.