Friday, March 27, 2015

Mascarpone Cheese

You may remember that last month I made ladyfingers, with the hope of being able to make my own Mascarpone cheese to turn out a Tiramisu. 

Well, I haven't tackled the Tiramisu just yet, but I was able to make Mascarpone! 

This recipe (Food 52) made it so dang easy and all it takes are two ingredients: cream and lemon juice.

I don't have pictures of the process, because both hands were busy stirring the cream and using an instant-read thermometer to keep the temperature in check. However, here's the final result:


And not only are there two ingredients, there are only five steps to make the cheese:
  1. Heat the cream to 180 degrees.
  2. Let it simmer at that temp for three minutes, then add the lemon juice.
  3. Simmer for another three minutes, then remove from heat. Cool to room temperature (about 30 minutes).
  4. Fill a small strainer with layers of cheesecloth and put a small bowl under the strainer.
  5. Pour the cooled cheese into the cheesecloth and place the entire bowl in the fridge overnight.

The only thing I will do differently the next time is to try using a coffee filter, instead of cheesecloth, to strain off the whey. I am hoping it will be easier to remove the cheese after its stay in the refrigerator.

The final product is amazingly thick with a slight tang and tastes absolutely delicious. For this batch, I'm going to serve it with some lovely strawberries. 

Can't wait to make Tiramisu!

Saturday, March 21, 2015

Pork Adobo

Yesterday was really hot and humid, meaning it was the perfect day to have my oven on for three and half hours to make this recipe (Food Republic). 

Seriously, making a recipe like this in the heat either shows how much I love to cook or that I'm a lunatic. Probably a bit of both.

Anyway, let's chat about the dry rub for this beauty:


That's a 5 1/2 pound pork shoulder with lovely fat.

The dry rub contains paprika, salt, garlic, cayenne, black pepper, and brown sugar.


I rubbed this all over the pork...


...then wrapped the meat in plastic and put it in the fridge for an hour.

When time was up, the pork was placed in a roasting pan and popped into a pre-heated 450 degree oven for 30 minutes.


After 30 minutes, I pulled the pan from the oven and dropped the heat to 325 degrees.

Beer and water were then poured over the roast, and a slew of garlic cloves were added to the pan. I covered the pan with aluminium foil and put it back in the oven to roast away for two hours.

It was during this time that the house started to smell absolutely amazing.

After two hours was up, I pulled the pan from the oven, removed the foil temporarily, and added cider vinegar, brown sugar black pepper and soy sauce.

The foil was put back on the pan and popped back into the oven for another hour and a half.

This is what the roast looked like when it was finished its oven time:


I put the roast on a rack and, when it was cool enough to handle, shredded the meat, and put it in with the pan juices.


Of course, several samples were taste tested along the way.

I let the pork sit in the juice for a few hours, then portioned out what would be our dinner. 


Ladies and gentlemen, we are talking about some serious flavors here. The dry rub permeates the meat, which was uber juicy. And the soy sauce and vinegar elements offer a great yin/yang to all the spices. 

This was totally worth a hot kitchen on a hot day. 

Chicken Bacon Pasta

While putting together my weekly dinner menu, I try to incorporate dishes that are at least somewhat healthy. But then I run across a recipe that blows all those good intentions right out the window. Such was the case for this recipe (The Recipe Critic).

Seriously, who could pass up the opportunity to pair bacon with pasta, smothered in a cream sauce? Not me. 

First off, I fried up some bacon.


While that was cooking, I combined the ingredients for the dry rub that got put on the chicken breasts. Just a quick note -- I substituted thyme for the sage called for in the recipe.


When the bacon was done, I put the strips on paper towels to drain and to be crumbled later.  Some of the bacon fat was taken out of the pan, and the chicken breasts went in to saute for about 5 minutes on each side.

In the meantime, I made the cream sauce that included heavy cream, cream cheese, parmesan, garlic powder, red pepper flakes, salt, and pepper. Swoon.


The pasta got cooked and was added to the cream sauce. Another quick note -- the recipe called for the pasta to be rinsed with hot water. I don't rinse pasta, unless it will be used for something like a pasta salad. As a result, I skipped this step.


Time to bring all the pieces and parts to the plate.


Will it come as any surprise that we thought this was divine? No, didn't think so. The dry rub on the chicken brought some lovely savory and sweet notes to the dish, and the cream sauce was truly wonderful. I will say it was just a tad bit salty, but that was my error, not the recipe.

While clearly not a dish I will make on a regular basis, this is sinfully decadent for those times you want to treat yourself.

Saturday, March 14, 2015

Slow Cooked Curried Chickpeas

Y'all know my penchant for long recipes and ones that call for lots of ingredients. That's why I couldn't resist trying to make this curried chickpea dish published on Food Republic. And the bonus was that I could work with a number of Indian spices that I currently have an ongoing love affair with.

Now while none of the steps are difficult, the 10-hour cooking time required that I get a much earlier start in the kitchen than normal. Much coffee was consumed to keep my brain functioning.

Anyway, here's how it all went down, along with some personal notes along the way.

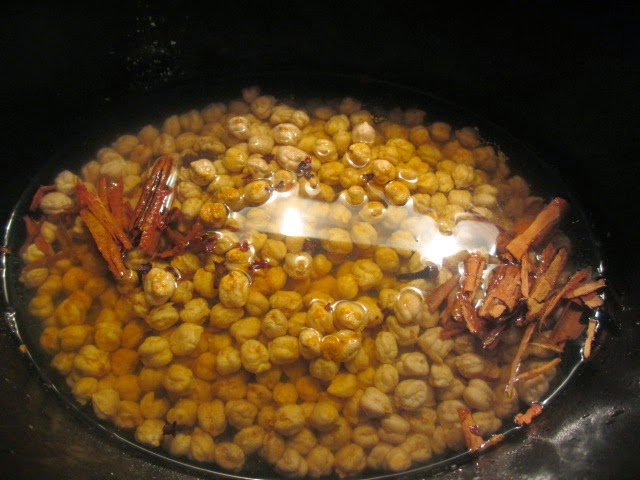
The chickpeas, water, cardamom, cassia (cinnamon), cloves, turmeric, and salt went into the slow cooker. I had no luck finding Indian red chili, so substituted some crushed red pepper flakes. The lid went on the slow cooker, the temp cranked up to high, and then I was off to start the masala.

A note about the water -- the recipe calls for 5-6 1/2 cups, which seemed a rather weird way to express the amount. I used the full 3 cups, because I did have some concerns about there not being enough liquid to cook the chickpeas.

Small-diced onions were put into a pan and fried until golden. While the onions were getting a tan, the garlic and ginger got a quick puree. Then the same puree treatment was given to the tomatoes.

Another pause in the action here to talk about the tomatoes. When I first read the recipe, I thought the author meant two cans of whole, peeled tomatoes. After rereading it, I came to realize only two whole, peeled tomatoes from a can were needed. Also, I don't know why the recipe calls for 1 medium tomato (not from a can). If anyone can explain, I would love to hear your thoughts.

Back to the action.

The garlic/ginger/tomato puree was added to the onions. Then some some awesome spices -- coriander, cumin, turmeric -- were added, along with a pinch more red chili flakes, salt, and pepper. I had to give the green mango paste a pass, because there was none to be found.

The aroma was amazing. This lovely sauce was added to the slow cooker, along with the water used to deglaze the pan.

The slow cooker lid was put back on, the temp turned to low, and then it was just a matter of 10 hours cooking time to see what would happen.

During the ensuing hours, the aroma of the masala intensified, filling the entire house with what I can only describe as a warm, intoxicating scent, not unlike a perfume.

When the 10 hours elapsed, it was time for the moment of truth. I had made some Basmati rice, and spooned the chickpea mixture on top, and garnished with cilantro.

The chickpeas were a bit firmer than I normally make, but were very tasty and brought a nutty component to the dish. The masala was outstanding and when combined with the spices used to start the chickpeas, an absolutely delightful flavor burst hits your tongue and stays there for a bit. 

I can not wait to make this masala again. It is really and truly awesome. I'm picturing it with some shrimp or chicken bits with no slow cooker or chickpeas required. Make no mistake, it's not like we didn't like the chickpeas, but the masala can easily stand on its own.

I do wish there had been more sauce, as the overall result was a bit on the dry side. We have leftovers, so I plan to puree the rest of the whole, canned tomatoes and add them in. David suggested maybe mushing up some of the chickpeas to add another texture dimension. 

All in all, this was a fun dish to make and big on flavor. Try it!

Buttermilk Banana Bread

Now that I am on a tear making my own cultured butter, I wanted to play around with the reserved buttermilk.

Believe it or not, the first day I made butter, this recipe appeared on my News Feed from the I Am Baker website. Coincidence? Hmmm...

I got to work.

First I sifted together the flour, baking powder, baking soda, and salt.

Next came creaming my butter and sugar, then adding the eggs, one at a time. The buttermilk and vanilla joined the party and everything whisked away until just combined.

The flour didn't want to be left out, so that got added into the mix, again until just combined.

I had already thawed out some mashed bananas that were hanging out in the freezer and folded them into the batter.


Into a greased and floured loaf pan, and it was time for the oven.


It took about 55 minutes for the bread to bake and for a toothpick to come out clean.

The taste? Moist and not over-the-top sweet. My kind of bread. It must have been something others liked, 'cause there wasn't one piece left from the slices I took over to our weekly pool party.

Ginger Fried Rice

I am a sucker for recipes that call for topping a dish with a sunny-side-up egg. There's something about breaking open the yolk and seeing all that gooey liquid gold ooze out. Not to mention that I just love the taste of eggs.

That's why I couldn't resist this recipe from Smitten Kitchen. 

I got the ball rolling by mincing some garlic and ginger, then popping these tidbits into a pan with some pre-heated oil. 

When they were nice and crispy, they got removed to some paper towels and sprinkled with salt. They looked so good that I had to taste them right away. And geez, I could have devoured all of them right then and there.


In the same pan, I added a bit more oil then added some thinly sliced onions. The recipe calls for leeks, but they can be hard to come by here. 


I let the onions cook down until they were tender, then added in the rice that I had cooked the previous day.


After the rice started to brown a bit, I lowered the heat and cooked up two sunny-side-up eggs.

I spooned the rice on our plates, covered it with that yummy egg, drizzled some sesame oil and soy sauce on top, then finished with the crispy, brown ginger and garlic bits.


We had ourselves a winner! The combination of the creamy yolk, mixed with the crispy rice would have been good enough. But that extra crunch from the ginger/garlic bits took the dish to the next level. We also loved the warm flavor of the sesame oil combined with the saltiness of the soy sauce. 

Can't wait to make this again.

Saturday, March 7, 2015

Finnish Cardamom Rolls

Before moving to Belize, I didn't do much baking. Maybe some cookies now and again, but nothing out of the ordinary. Now? I seem to be baking something almost every week. Some of it has to do with wanting to bring something to the weekly pool party, but it's also been a case of trying to learn new things in the kitchen.

So when Cardamom Rolls appeared on my Facebook feed, I thought it might be just the thing to stretch my baking skills.

I haven't used cardamom that much in the past, so I did some reading about this spice. 

Did you know --
  • it's a member of the ginger family?
  • cardamom sees are found in small pods the size of a cranberry?
  • the pod shell will disintegrate while dishes like soups and stews cook?
  • the spice is widely used in Scandinavian and East Indian cooking?

Well there you go.

So moving on to the recipe...

The first step was to make the dough. I warmed up milk, mixed in the sugar and yeast and let it sit until the yeast got bubbly.


In the bowl of my standing mixer, I whisked together the eggs, butter, cardamom, and salt. 

*Note - I used ground cardamom.


The yeast mixture was added into the mixer bowl and combined with the butter mix. Then it was the flour's turn to hop in -- one cup at a time.

Once the dough formed into a ball, I put it in a lightly oiled bowl, covered with plastic wrap, and let it alone to rise.


About 1 1/2 hours later, the dough had doubled in size.


I punched the dough down and, using my kitchen scale, measured out four equal pieces. 

One at a time, each piece was rolled out to measure about 12 inches by 18 inches.

Some softened butter was brushed on each piece and a combo of sugar and cardamom was sprinkled on top.

Each buttered, spiced piece of dough was then rolled up.


Each log was cut on the diagonal, to create chubby 'v' shapes and placed on parchment-lined baking sheets.


When all the dough was cut, the rolls were left to rise again for about 30 minutes.

Before popping them into a pre-heated 350 degree oven, I brushed each of the rolls with some egg wash and sprinkled some regular, white sugar over them.

After baking for about 18 minutes, the rolls were done.


The verdict?


For starters, I was blown away by the dough. I was expecting something a bit on the dense side, but it was light and airy -- almost croissant like. 

As you can probably tell from the above picture, I could have rolled the buttered filled dough a bit tighter and the rolls would better retain their desired shape.

Instead of putting a dozen rolls on a baking sheet, I will probably put eight the next time. The reason is that they puff so much and not all of them had adequate space. 

I personally thought the rolls could hold up to a bit more sugar in the filling. And speaking of filling, I think you could put any number of combos. Cinnamon and or nutmeg would be lovely, maybe even some kind of jam or jelly. Will have to play with that.

Bottom line is that while these rolls do take a bit of effort, the reward is a super tasty treat. And because they're so light and airy, they work great as a nosh for breakfast, a quick snack, or a dessert.

Thai-style Chicken Noodle Soup

It doesn't matter what time of year it is, sometimes a bowl of chicken noodle soup is called for to put everything to rights.

So when I saw this recipe from Honest Cooking that included some Thai-inspired ingredients, well, I just knew I needed to give it a try.

The first thing I did was to prep my chicken. The recipe says to slice it into thin strips. However, I thought it might make it easier to eat if it was cut into bite-sized chunks. So that's what I did.


With the chicken cut up, I put garlic that I minced earlier into my pot and cooked them up in some olive oil until the garlic was golden brown.

Then I added the chicken bits, turmeric, cayenne, and chili flakes. Everything was given a stir and allowed to fry away for a couple of minutes.


A quick side note about using turmeric. While it brings lovely color to a dish, be forewarned it may stain your fingers or other surfaces it might accidentally come in contact with. Don't ask me how I know this, but it's safe to presume it was a klutz move on my part.

Next up, I added the coconut milk, chicken stock, lime juice, fish sauce, and the pineapple juice, then whisked in the peanut butter.


*Note - the recipe calls for lemon grass paste, but that's not available here. 

I let the soup simmer for a bit, then added some noodles. When they were ready, it was time to plate.


The broth is so, so good! I would be happy just to have a bowl of it without any chicken or noodles. It's a wonderful combination and balance of spicy and sweet that will warm you body and soul. 


Friday, February 27, 2015

Tomato and Lime Shrimp

I love complicated recipes. You know, the ones where the ingredients list runs a full page and there are at least a couple of pages of instructions. 

But every so often, there will be a recipe that is short and simple that catches my eye, mostly due to the ingredients.

This recipe from Honest Cooking is one of those. Shrimp, lime juice, tomatoes? Sign me up.

I got started by giving the onion a rough chop. The recipe calls for a jalapeno, but none were to be found at the market. But never fear, I just upped the crushed red pepper flakes for some heat. 

The onions and crushed pepper got a good saute, until the onions had softened.


Next up were the tomatoes. I knew it would be impossible to use Campari tomatoes and, quite frankly, I'm not sure how available they are in the States.

Instead I drained two cans of diced tomatoes (reserving the liquid). The tomatoes were added to the onions, along with some, and everything simmered for a bit. As the tomatoes started to break down, I added a bit of the reserved liquid to keep everything from drying out.


The lime juice was then added and then the shrimp. As soon as the shrimp turned pink, the pan was taken off the heat.

Now the recipe recommends serving it with pieces of baguette. I decided to go in a different direction and plated it over rice, garnished with chopped cilantro.


It only took one bite to know this was a keeper. The taste of the tomatoes really comes through, the zip of the lime juice is just enough to make your taste buds sing, and the shrimp turned out juicy and delicious.

And while we ate all the shrimp, there was still a decent amount of sauce leftover. We plan on putting it on our next pizza for a real taste treat.

Sometimes simple is better.

Cultured Butter

In my last post, I shared how to make quick and easy butter. A Facebook friend, Noelle, commented that her husband makes cultured butter. Intrigued by this, I started reading up on the subject. Apparently cultured butter has a tang to it and is smooth and glossy looking. Plus it takes a bit of planning and time (mostly unattended).

And here are some other fun facts to know and tell:
  • Raw or pasteurized cream can be used
  • If using pasteurized, it will need some sort of culture added to the cream, such as mesophilic yogurt, cultured buttermilk, or Milk Kefir Grains.  
  • If using raw cream, it will culture all on its own at room temperature.
I lucked out because I had raw cream at my disposal. So let's see how this kitchen adventure unfolded.

For this butter round, I used four bags of cream (about 30 ounces). The bags were poured in a bowl and stood at room temperature for about 20 hours.


I could tell once time was up that something had been going on. The cream went from a thick, fluid state to being set. The bowl got popped into the fridge for five hours to stop the culturing process.

To give you some idea how thick the cream got, here's what a scoop of it looked like after coming out of its refrigerator hibernation:


I must admit that I was tempted to just stop the recipe process right then and there. The cream looked so, ummm, creamy and delicious, and just screaming to be spread on some lovely warm bread. But being the intrepid kitchen maven, I got a hold of my senses and soldiered on.

Knowing how much liquid came out of my original butter batch, I figured it would be best to divide this batch in half.

So half of the cultured cream got put into the bowl of the standing mixer. Using the whisk attachment, beating commenced. Here is the cream when it hit soft peak stage:


Keeping the mixer on about medium speed, the cream continued to whip until I saw the water beginning to separate. At that point, I backed down the mixer speed. Most of the solids worked themselves into the whisk:


Using a rubber spatula, the butter was removed from the whisk and plopped into a large bowl. Using a slotted spoon, I was able to retrieve any whipped bits that were still in the bowl. 

The liquid that was in the bottom of the bowl, the buttermilk, got poured into a measuring cup. 

I repeated the whipping process with the remaining cream.

The final amount of buttermilk that was extracted:


With the full batch whipped and now in the bowl, I poured some purified water over the butter.


I used a wooden spoon to rather smush up (a technical term dontcha' know) the butter to extract the remaining buttermilk. After smushing for a bit, the water got poured off and clean water was put in. I repeated the smushing process until the water was clear and the last traces of buttermilk were gone.


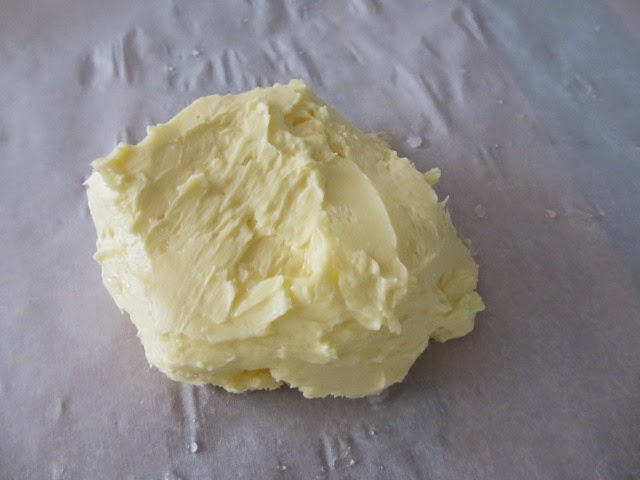
Not having any fancy-schmantzy butter molds, I free-formed a block of butter on a piece of parchment paper:


The final yield of butter was about 13 ounces from the original 30 ounces of cream. 

Without a doubt, this butter was smooth (ignore my spatula marks) and glossy. I had already taken the quick and easy butter that was made the day before out of the fridge. Now it was time for the taste test.

David and I tried the quick and easy butter first. And guess what? It tasted like butter! Then we sampled the cultured version. This one was richer, a bit more tangy, and a delight. I can't wait to see if we notice any difference when I cook and bake with it.

David wondered if the taste difference was substantial enough to warrant the extra time. I think it is. But I will say that if I'm in a hurry, have raw cream on hand, and need butter right away, the quick and easy method will be the way I go.

Noelle, thank you for introducing me to another level of butter heaven. 

But before ending this post, I have some notes that may possibly be of some use for those looking to try this recipe:
  • I initially put the cream on the counter, covered with a couple of colanders. This was mostly to keep the cat princess, Bronte, from taking a sample. Later in the day, I put the bowl into an unheated oven to ensure the cream was cat proof.

  • Now that warmer weather is setting in, I may need to shorten the time of leaving the cream to culture at room temperature. 
  • Remember that buttermilk that I reserved? Well call it providence, karma, fate, whatever, but while my butter was doing it cultural thing, a recipe for banana buttermilk bread appeared on my Facebook news feed. Will be making that in the next day or two and will post results.
  • Butter molds are in my future.

Monday, February 23, 2015

Butter (Quick and Easy)

One of the quirks of living in Corozal is that there are times when certain grocery store items disappear from the shelves. Right now, the missing item is butter.

This is the brand I use. 


Actually, it's about the only brand to choose from, unless you prefer margarine or canned butter.


During a previous butter shortage, I did try the canned stuff. But I really didn't like the taste.

Instead of waiting and hoping for the reappearance of butter, I decided to make my own.

It's dead easy and fast to do.

I took two bags of cream and poured them into the bowl of my standing mixer.


Using the whisk attachment, I beat the cream on medium speed. It started to thicken, go into a whipped state, then the water started to separate from the solids. At that point, I lowered the mixer speed, so as to not have the water flying about outside the bowl.


I put the solids in a cheesecloth lined colander and let it finish draining off any remaining water.

End result? Badda Bing, Badda Bam, Butter!